
Welcome to the ultimate beginner’s guide on how to use chocolate molds! If you’re passionate about chocolate and eager to create stunning confections from the comfort of your kitchen, you’re in the right place. Using chocolate molds is a delightful and rewarding experience that allows you to unleash your creativity and impress your friends and family with professional-looking chocolates. In this guide, we’ll walk you through everything you need to know to achieve chocolate perfection every time.
Getting Started with Chocolate Molds
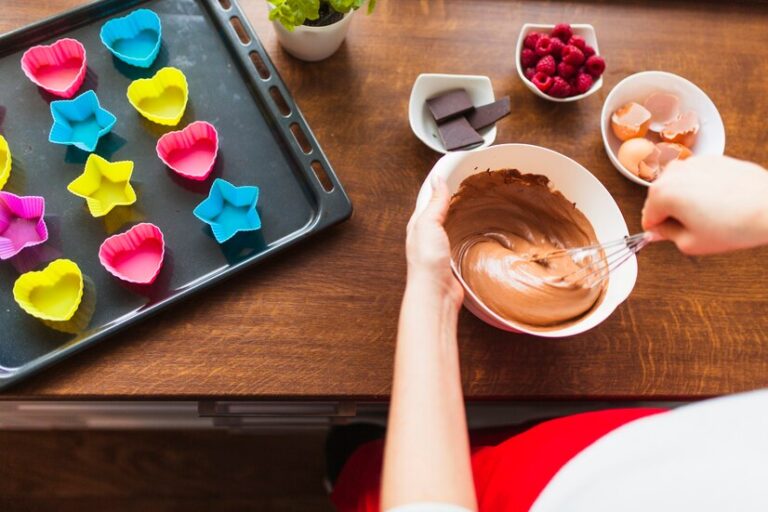
Understanding Chocolate Molds
Chocolate molds are essential tools for any aspiring chocolatier. These molds come in various shapes, sizes, and materials, allowing you to create an endless array of chocolate treats. From classic bonbons to intricate shapes and designs, the possibilities are endless with the right molds.
Types of Chocolate Molds
There are several types of chocolate molds available, each suited for different purposes. Silicone molds are flexible and easy to use, while polycarbonate molds offer precise detailing for professional-looking chocolates. Additionally, there are novelty molds for themed chocolates and magnetic molds for easy filling and demolding.
Choosing the Right Chocolate
The type of chocolate you use plays a crucial role in the success of your chocolate creations. Opt for high-quality chocolate with a cocoa content of at least 60% for rich flavor and smooth texture. Dark, milk, and white chocolate each have their unique characteristics, so choose the one that best suits your taste preferences and recipe requirements.
Preparing Your Chocolate
Tempering Chocolate
Tempering chocolate is essential for achieving a glossy finish and proper texture in your chocolates. This process involves melting the chocolate, then gradually cooling and reheating it to specific temperatures. Tempering prevents dullness, ensures a satisfying snap, and improves shelf life.
Melting Chocolate
Whether you’re using a microwave, double boiler, or chocolate melter, melting chocolate requires gentle heat and careful monitoring to avoid burning or seizing. Chop the chocolate into small, uniform pieces for even melting, and stir frequently for smooth consistency.
Adding Flavor and Color
Experiment with different flavorings and colors to customize your chocolates and elevate their taste and appearance. Add extracts, spices, or liqueurs to the melted chocolate for flavor, and use food coloring or cocoa butter powder for vibrant hues.
Filling and Demolding Chocolates
Filling Chocolate Molds
Fill each mold cavity with melted chocolate using a spoon, piping bag, or offset spatula, ensuring even distribution and smooth surfaces. Tap the molds gently on the countertop to remove air bubbles and level the chocolate.
Demolding Chocolates
Once the chocolate has set, carefully invert the mold and gently flex or tap it to release the chocolates. If using rigid molds, avoid twisting or bending them to prevent breakage. For stubborn chocolates, place the mold in the refrigerator briefly to firm up before demolding.
Decorating and Storing Chocolates
Decorating Chocolates
Get creative with decorations to add visual appeal to your chocolates. Drizzle melted chocolate, sprinkle chopped nuts or sprinkles, or dust with cocoa powder for elegant finishing touches. You can also use edible glitter, gold leaf, or transfer sheets for a touch of luxury.
Storing Chocolates
Proper storage is essential for maintaining the quality and freshness of your chocolates. Store them in a cool, dry place away from direct sunlight and strong odors. Avoid refrigeration, as condensation can cause blooming and alter the texture of the chocolates.
Troubleshooting Tips
Preventing Chocolate Seizing
Chocolate seizing occurs when moisture comes into contact with melted chocolate, causing it to become thick and grainy. To prevent seizing, ensure all utensils and surfaces are completely dry before working with chocolate, and avoid overheating.
Fixing Chocolate Blooming
Chocolate blooming is characterized by white streaks or spots on the surface of chocolates caused by temperature fluctuations. To fix blooming, gently warm the chocolates with a hairdryer or heat gun to re-melt the cocoa butter and restore the smooth surface.
Conclusion
Congratulations, you’ve completed our beginner’s guide on how to use chocolate molds! Armed with this knowledge and a dash of creativity, you’re ready to embark on your chocolate-making journey and impress your loved ones with delectable homemade treats. Remember to have fun, experiment with different flavors and designs, and don’t be afraid to embrace your inner chocolatier. Happy chocolate making!
FAQs
Can I reuse chocolate molds?
Yes, chocolate molds are reusable and can be cleaned with warm, soapy water after each use.
How do I prevent chocolates from sticking to the mold?
Properly tempering the chocolate and greasing the mold with cocoa butter or non-stick spray can help prevent sticking.
Can I use candy melts instead of chocolate?
Candy melts are a convenient alternative to chocolate and come in various colors and flavors, but they have a different taste and texture.
How long does it take for chocolates to set in the mold?
The setting time depends on various factors such as room temperature, chocolate type, and mold size, but it typically ranges from 30 minutes to 1 hour.
Can I add fillings to chocolates before they set?
Yes, you can add fillings such as caramel, nuts, or ganache to chocolates before they set for deliciously indulgent treats.
What should I do if my chocolate doesn’t release from the mold?
Place the mold in the refrigerator for a few minutes to firm up the chocolate, then try demolding again.